How to Bind a Proxy IP?
更新于 2026-07-14
Before getting started, there is one essential step that must be completed first — proxy IP configuration.
Whether you plan to bind an existing TikTok account or use this environment for automated account registration, setting up a proxy IP is the first priority. It is the foundation of TikTok account operations and the first layer of account security protection.
Why Is Proxy IP Configuration Important?
TikTok is highly sensitive to network environments. If you use data center IPs or frequently switch between IP addresses from different regions, the platform may identify the activity as abnormal login behavior. This can result in reduced traffic distribution or even account suspension.
A stable and clean static residential IP works like having a fixed “home address” in your target country, helping TikTok recognize your account as a genuine local user.
TikSales supports two methods for proxy IP configuration:
Use your own third-party proxy
Purchase a residential proxy directly within the system
Choose the method that best fits your situation and follow the steps below.
If you already have a proxy IP, please configure it in the Environment Management section by following these steps:
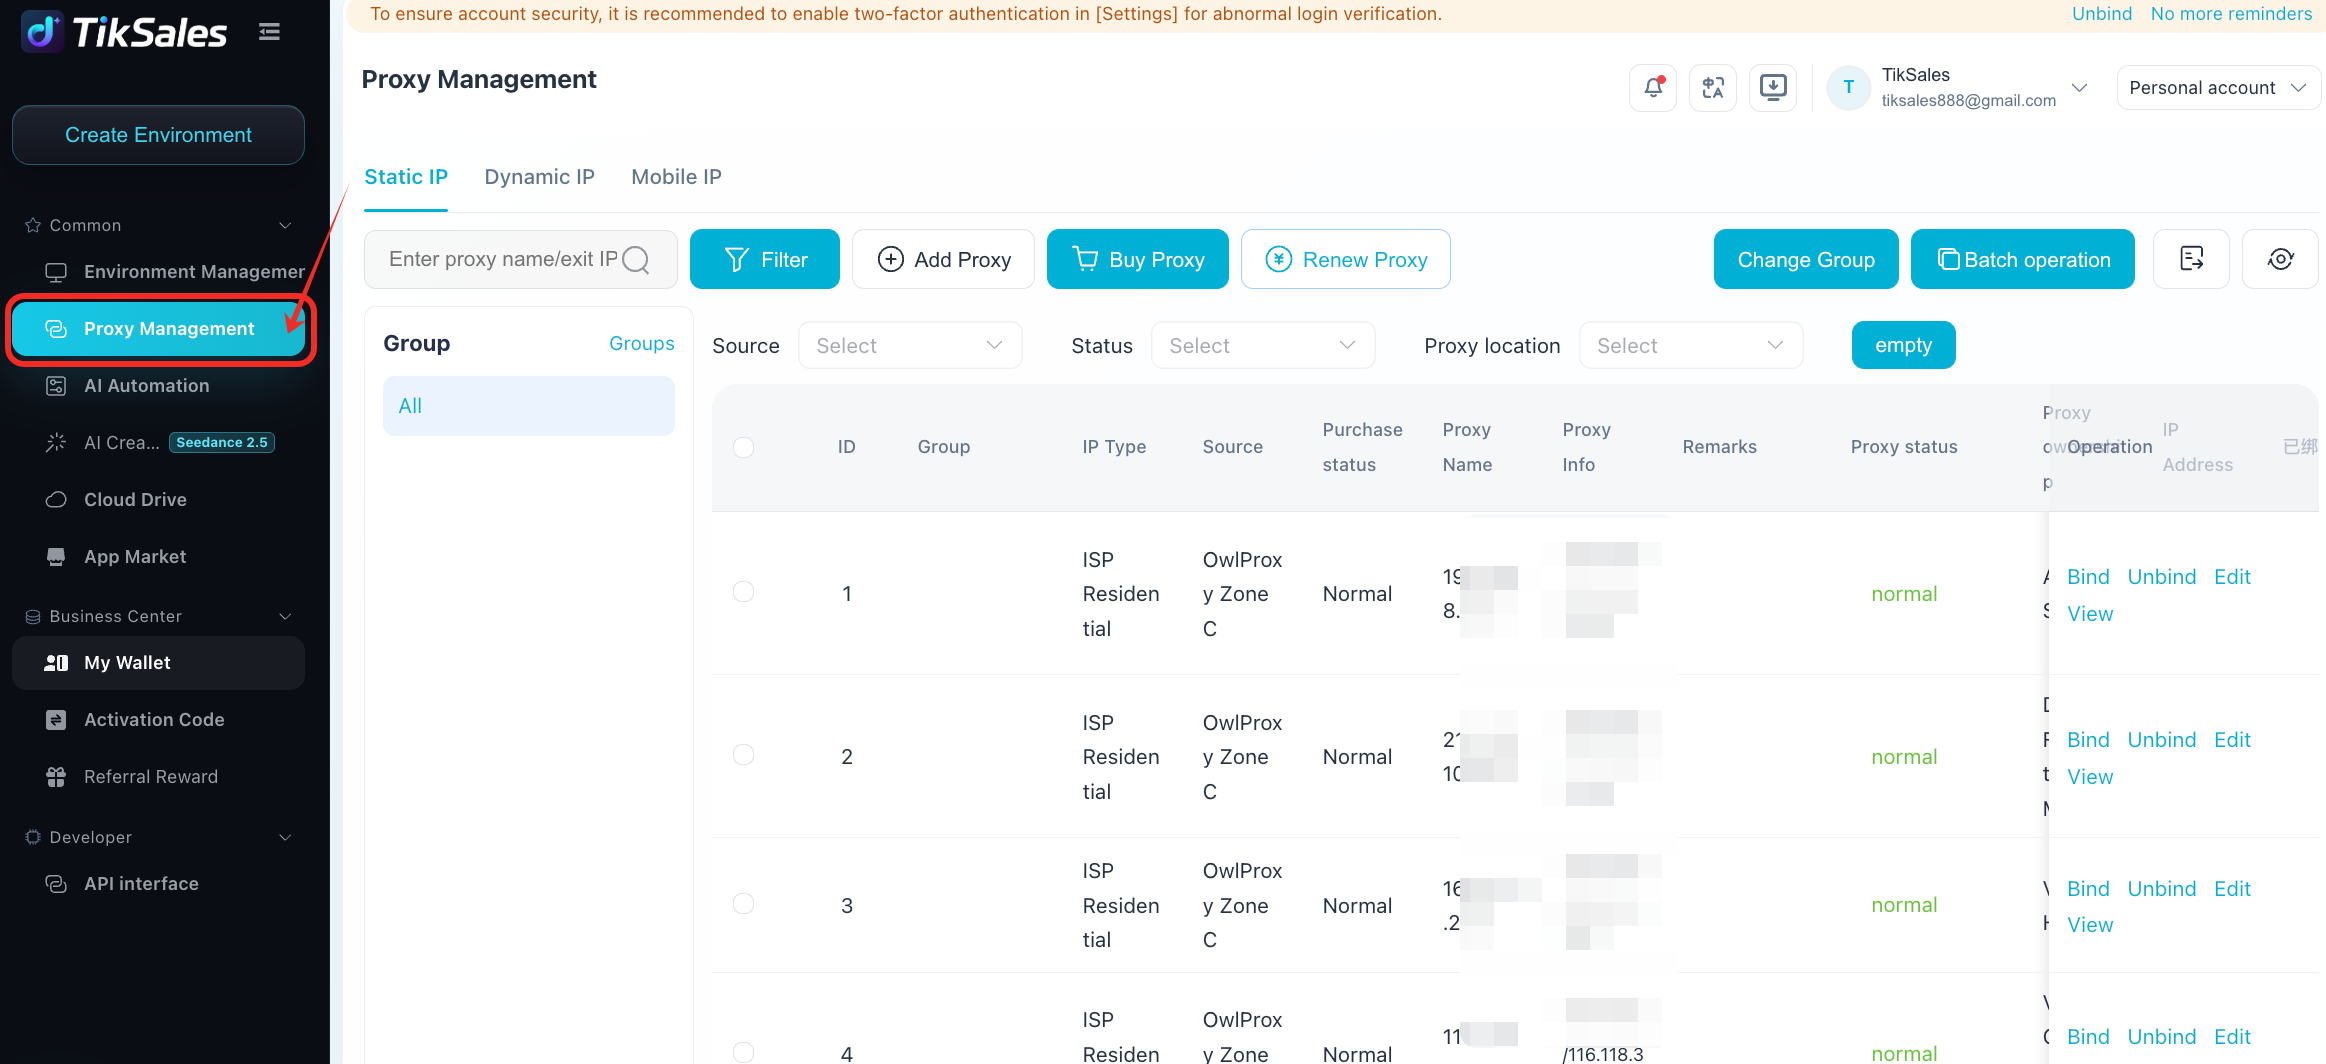
Step 1: Go to Proxy Management
Enter the Proxy Management interface.
Step 2: Purchase or Add a Third-Party Proxy
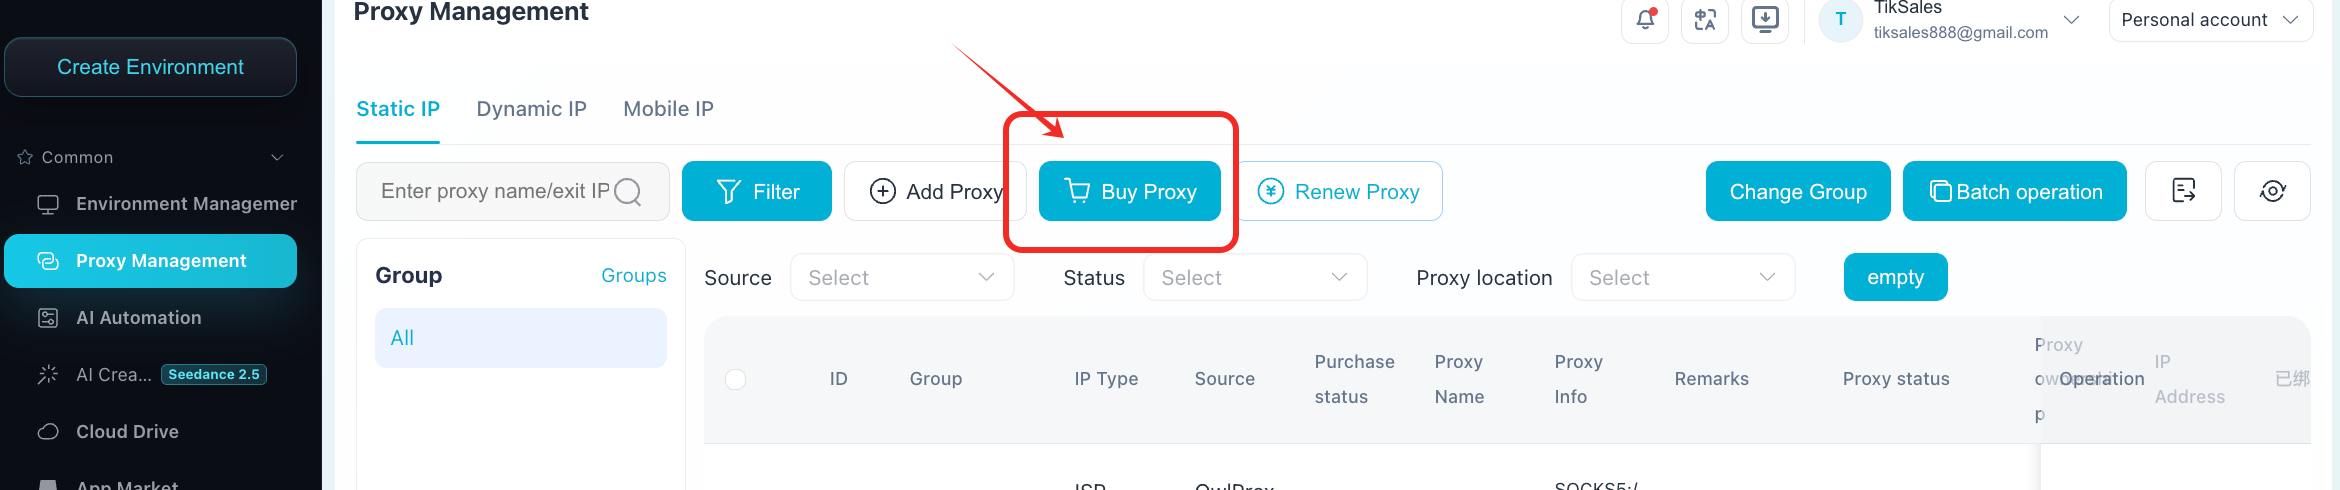
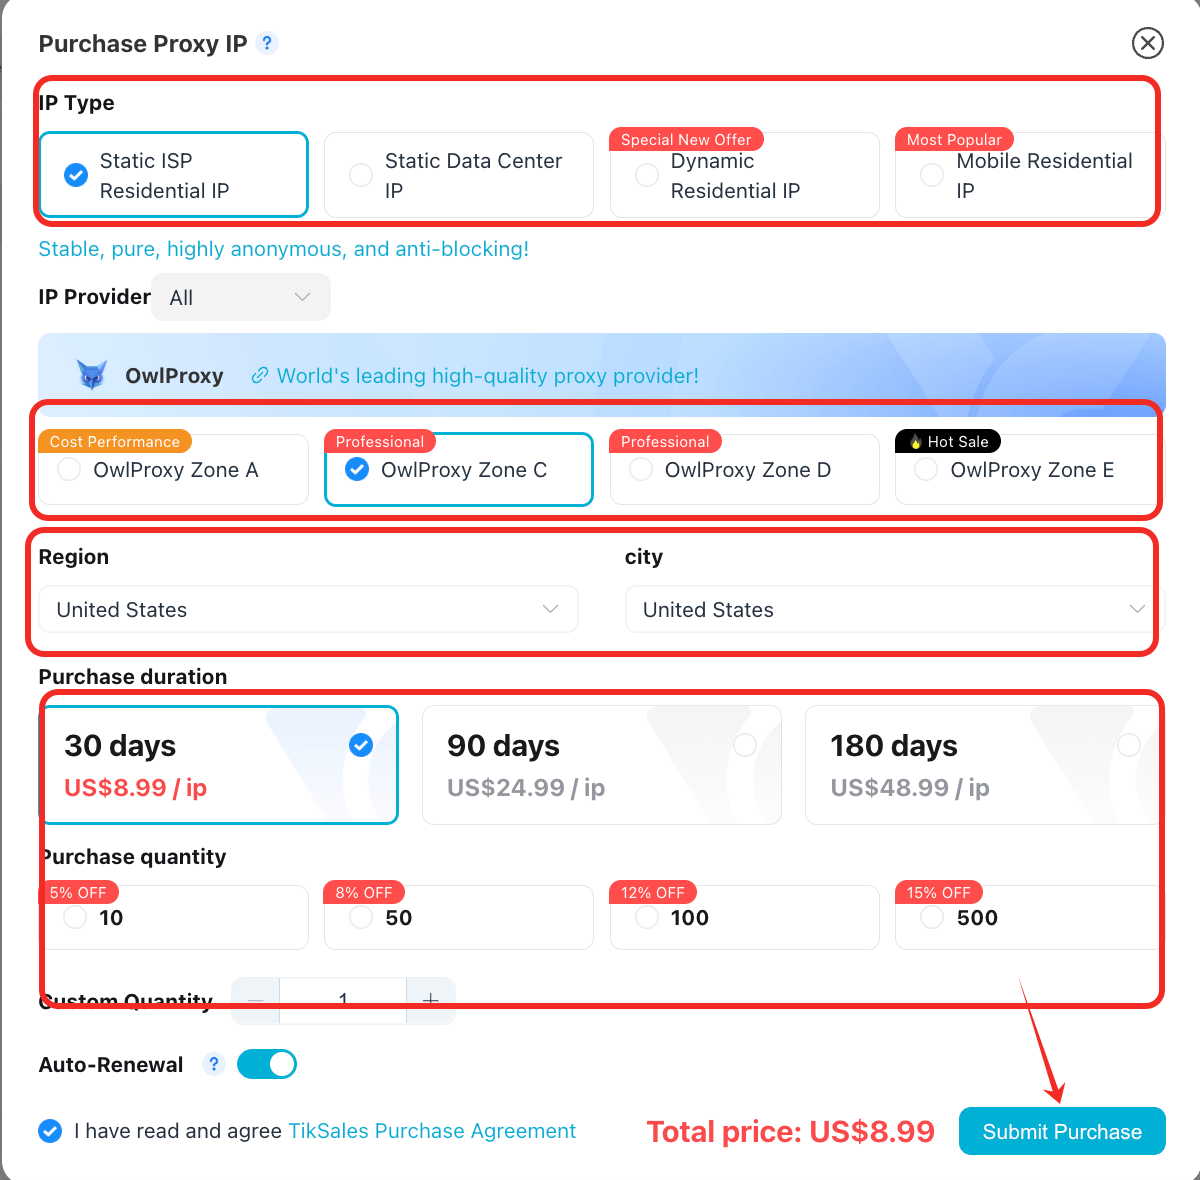
Purchase a Proxy
You can purchase a proxy directly through TikSales.
For TikTok operations, we recommend using Static Residential IPs (C-zone). Ideally, each IP should correspond to one environment. We recommend binding each IP to no more than 3–5 device environments.
Add a Proxy
If you already have a third-party proxy, enter the required proxy parameters, including:
Proxy Type (HTTP/SOCKS5)
Server Address
Port
Authentication Information

Step 3: Complete Binding
Before binding, please make sure the environment is powered on.
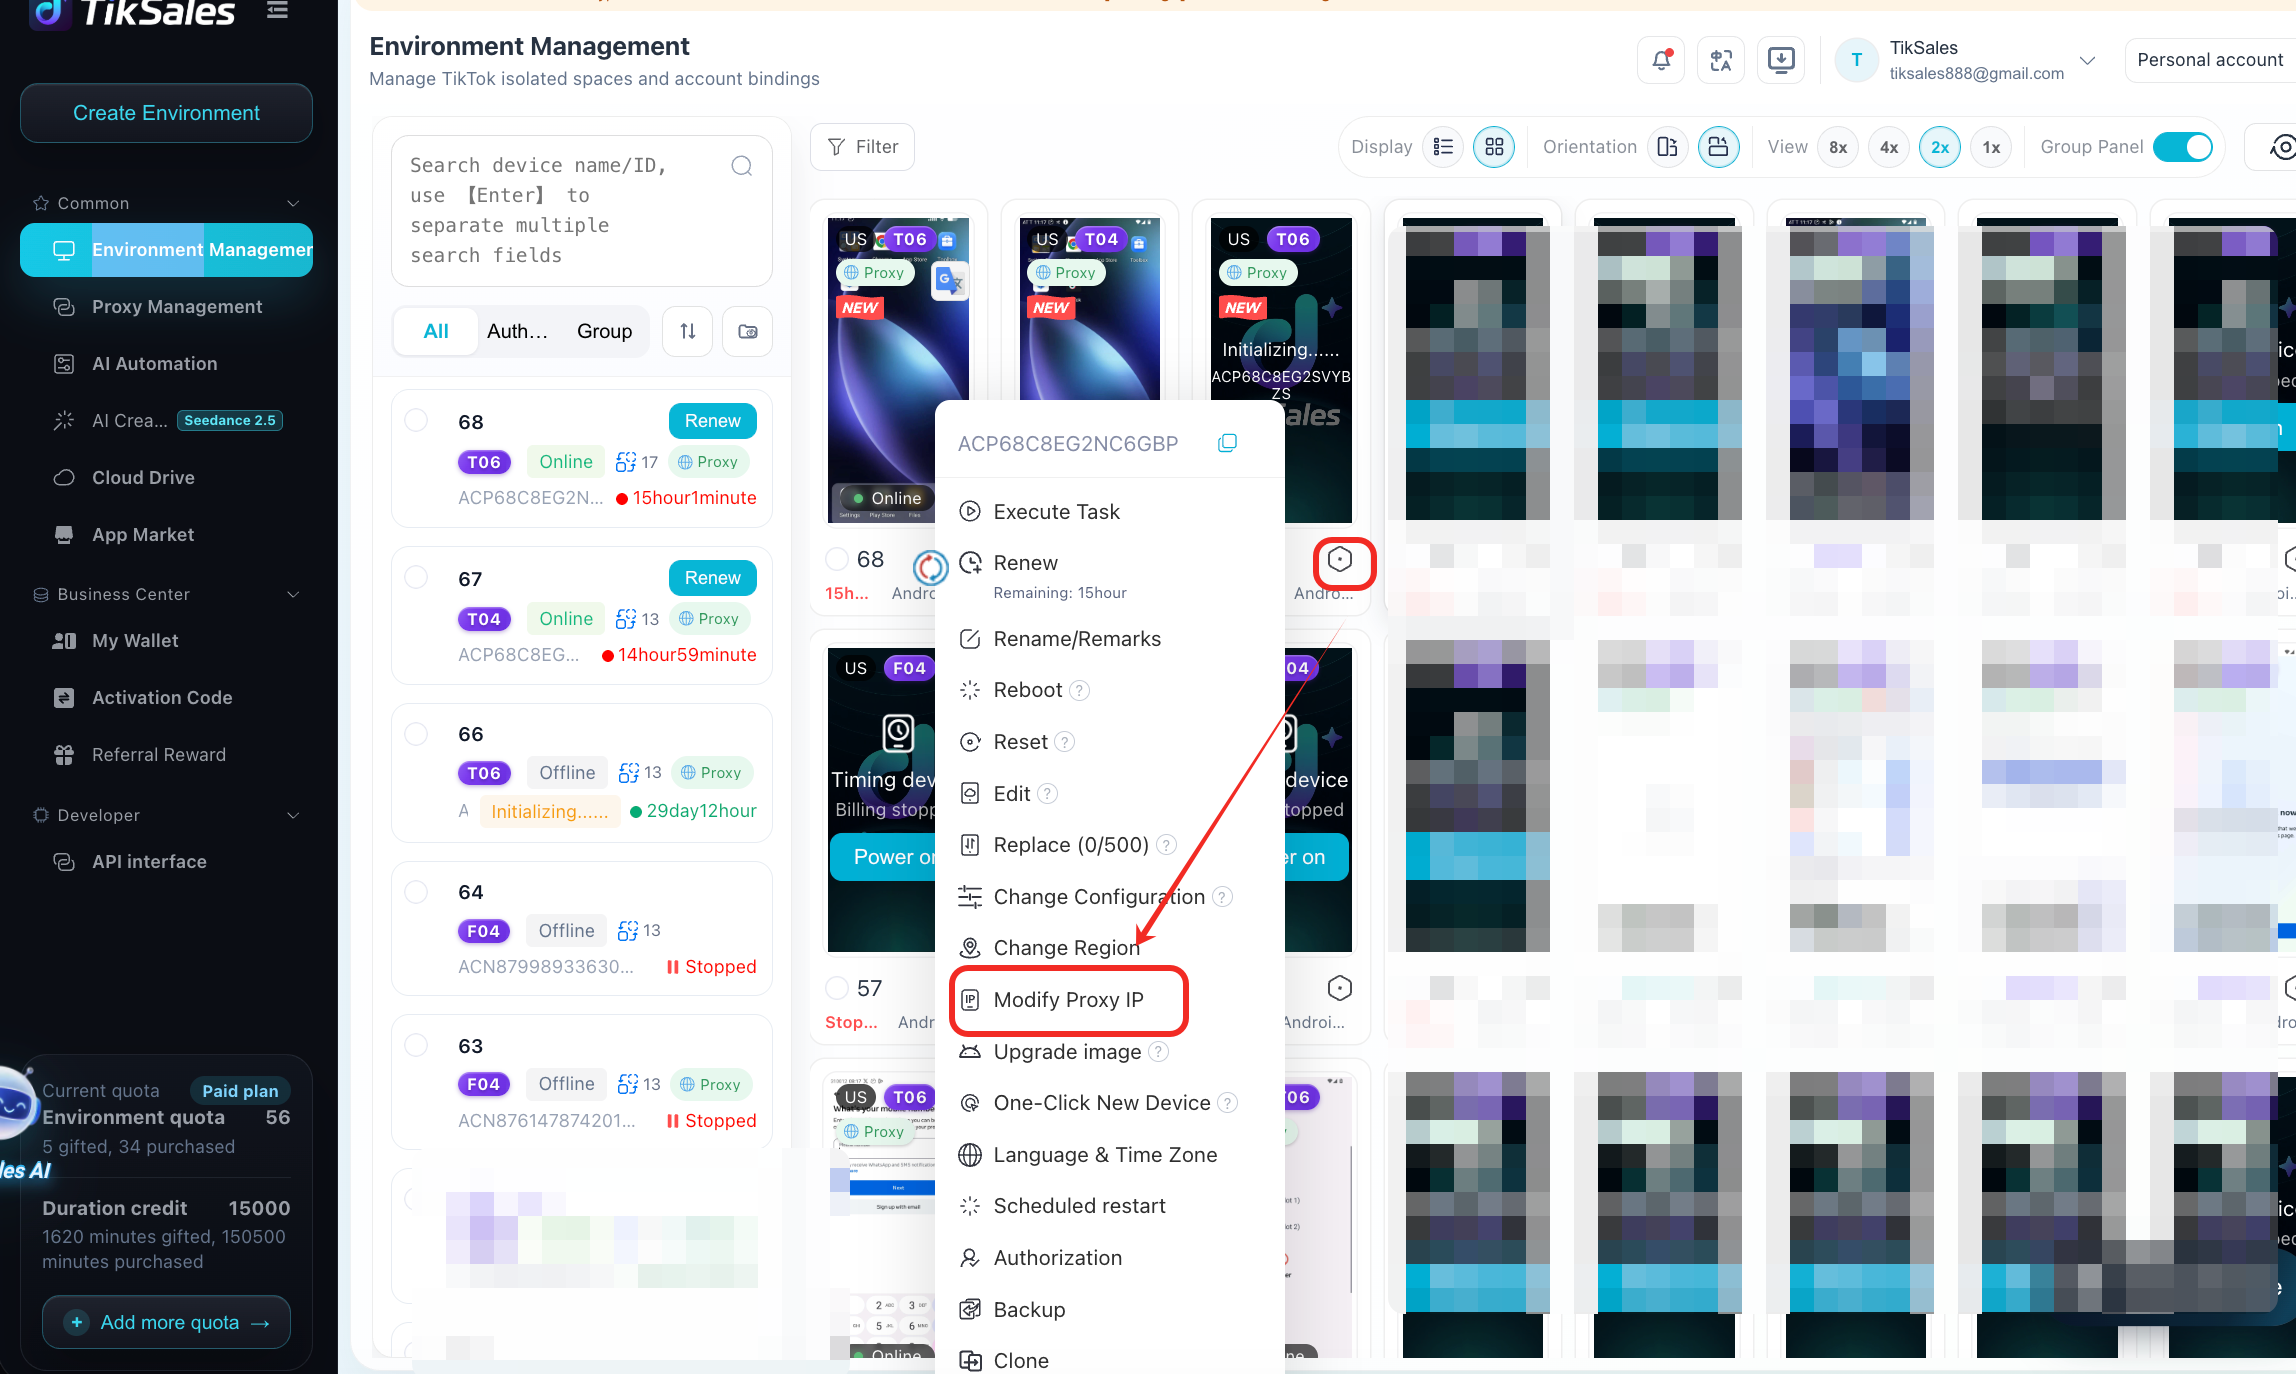
Bind a Proxy to a Single Environment
In Environment Management, select the device and click the Settings icon in the bottom-right corner. Then click Change Proxy IP and select the proxy you want to use.
Bind the Same Proxy IP to Multiple Environments
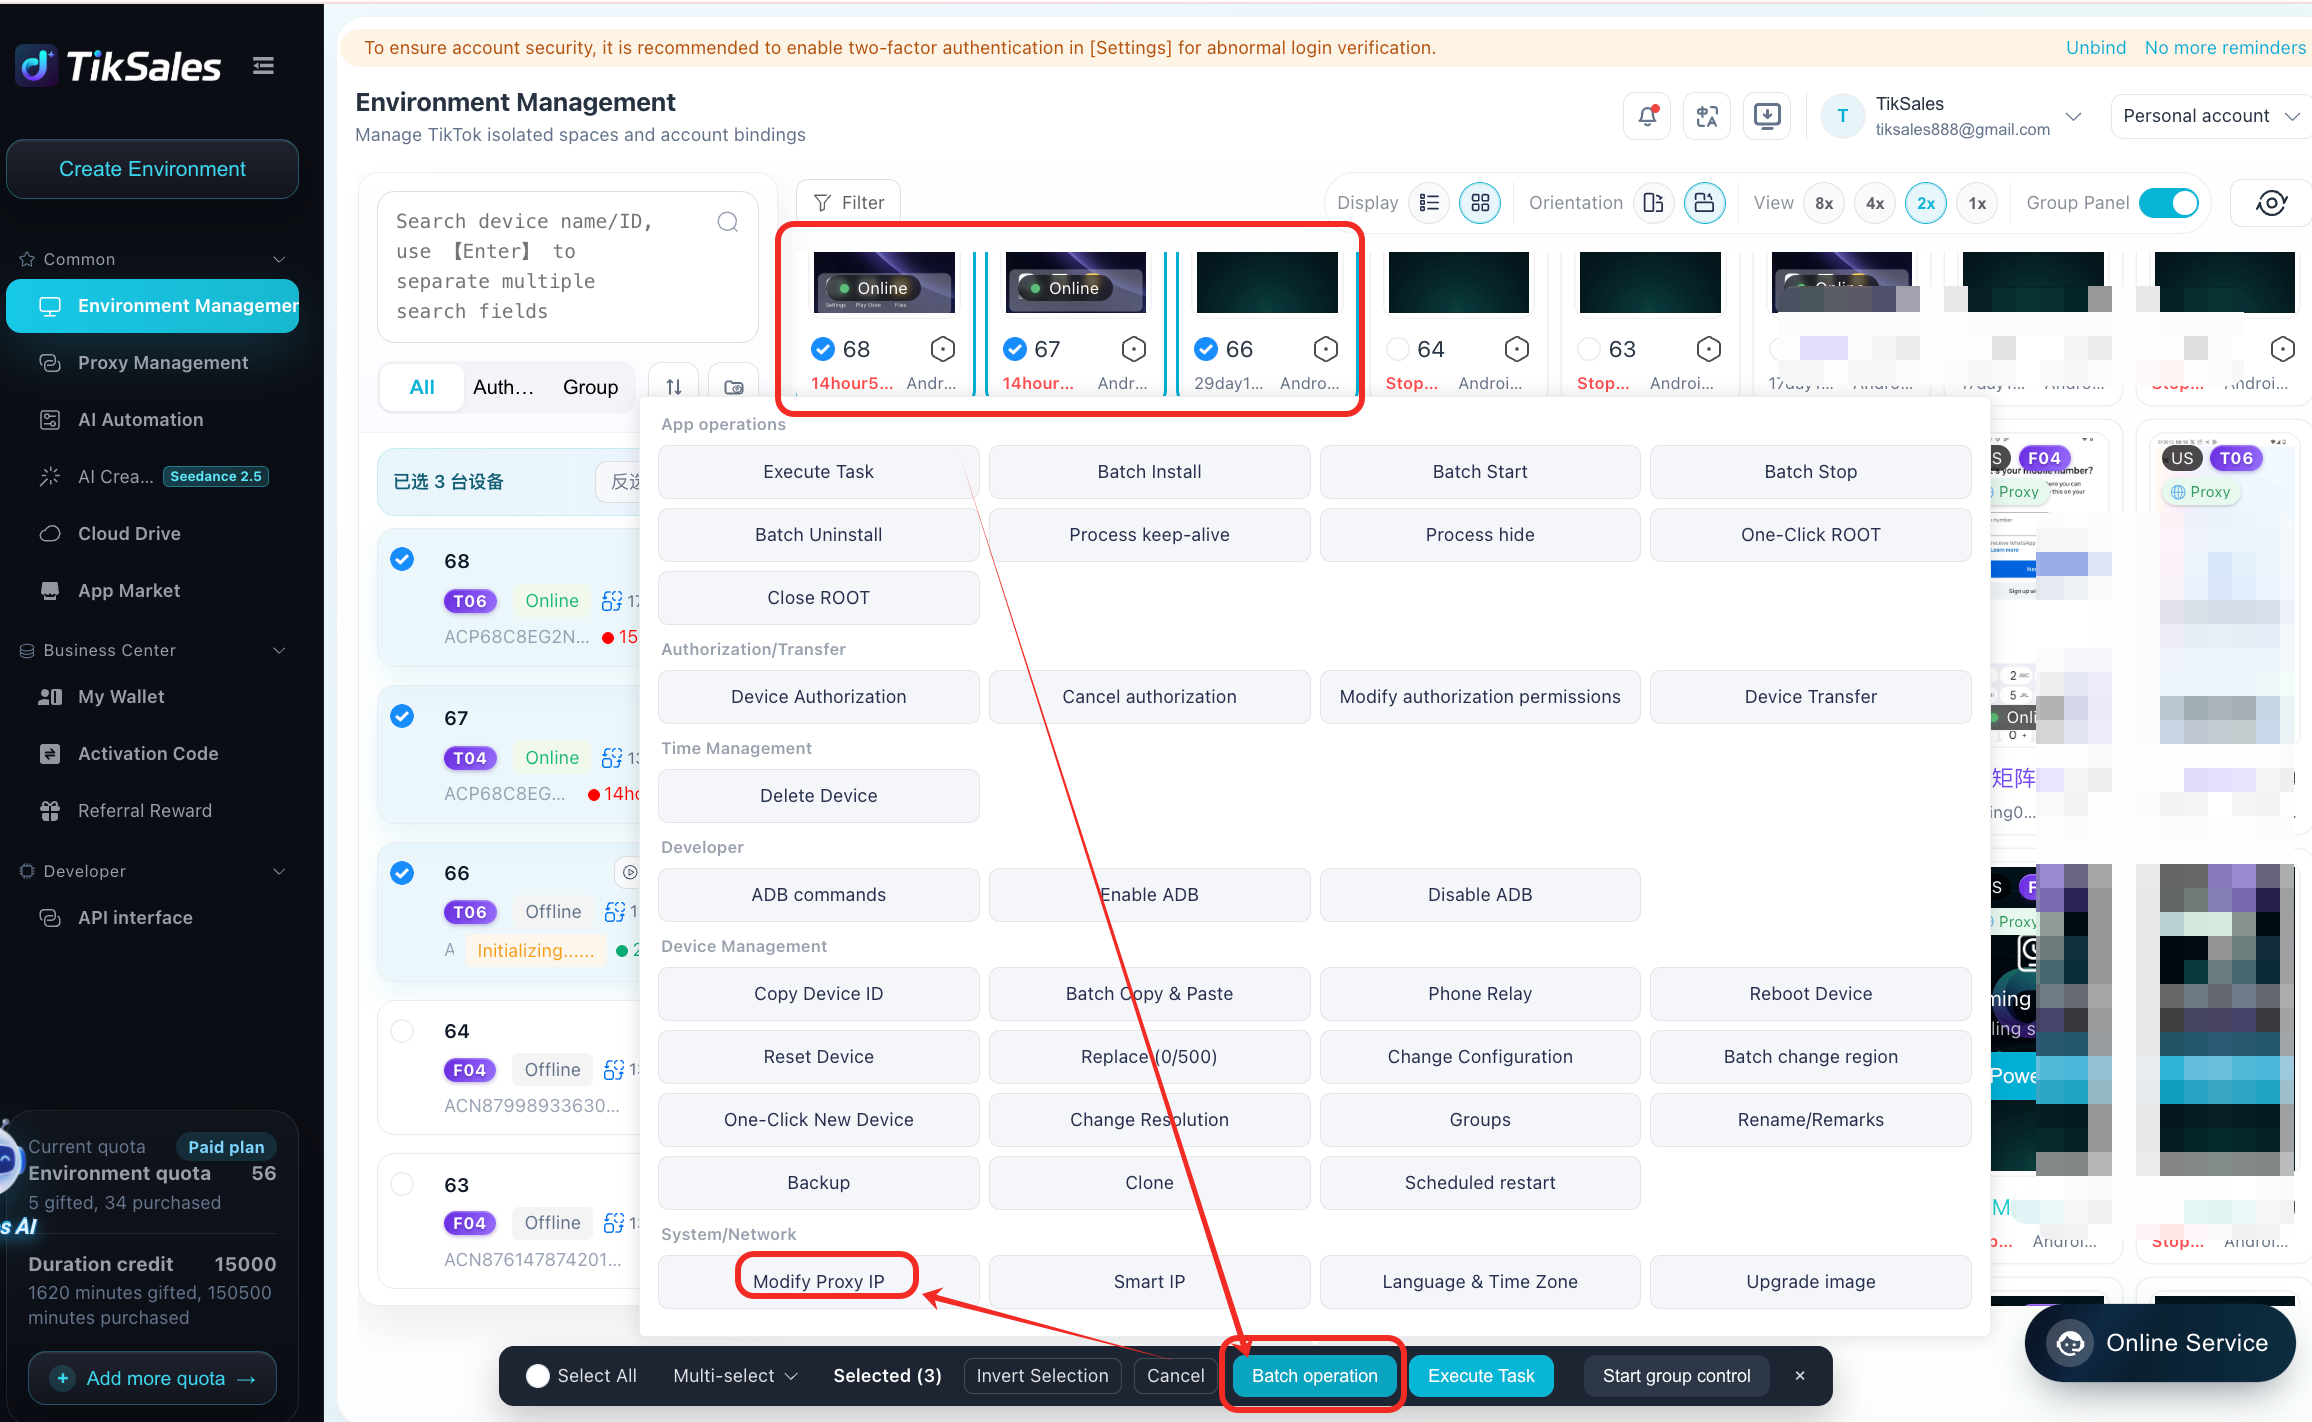
If you want to configure the same proxy for multiple environments, select all the required devices and use Batch Actions → Modify Proxy IP.
This allows you to bind the same proxy to multiple environments at once.
Batch Bind Multiple Proxies
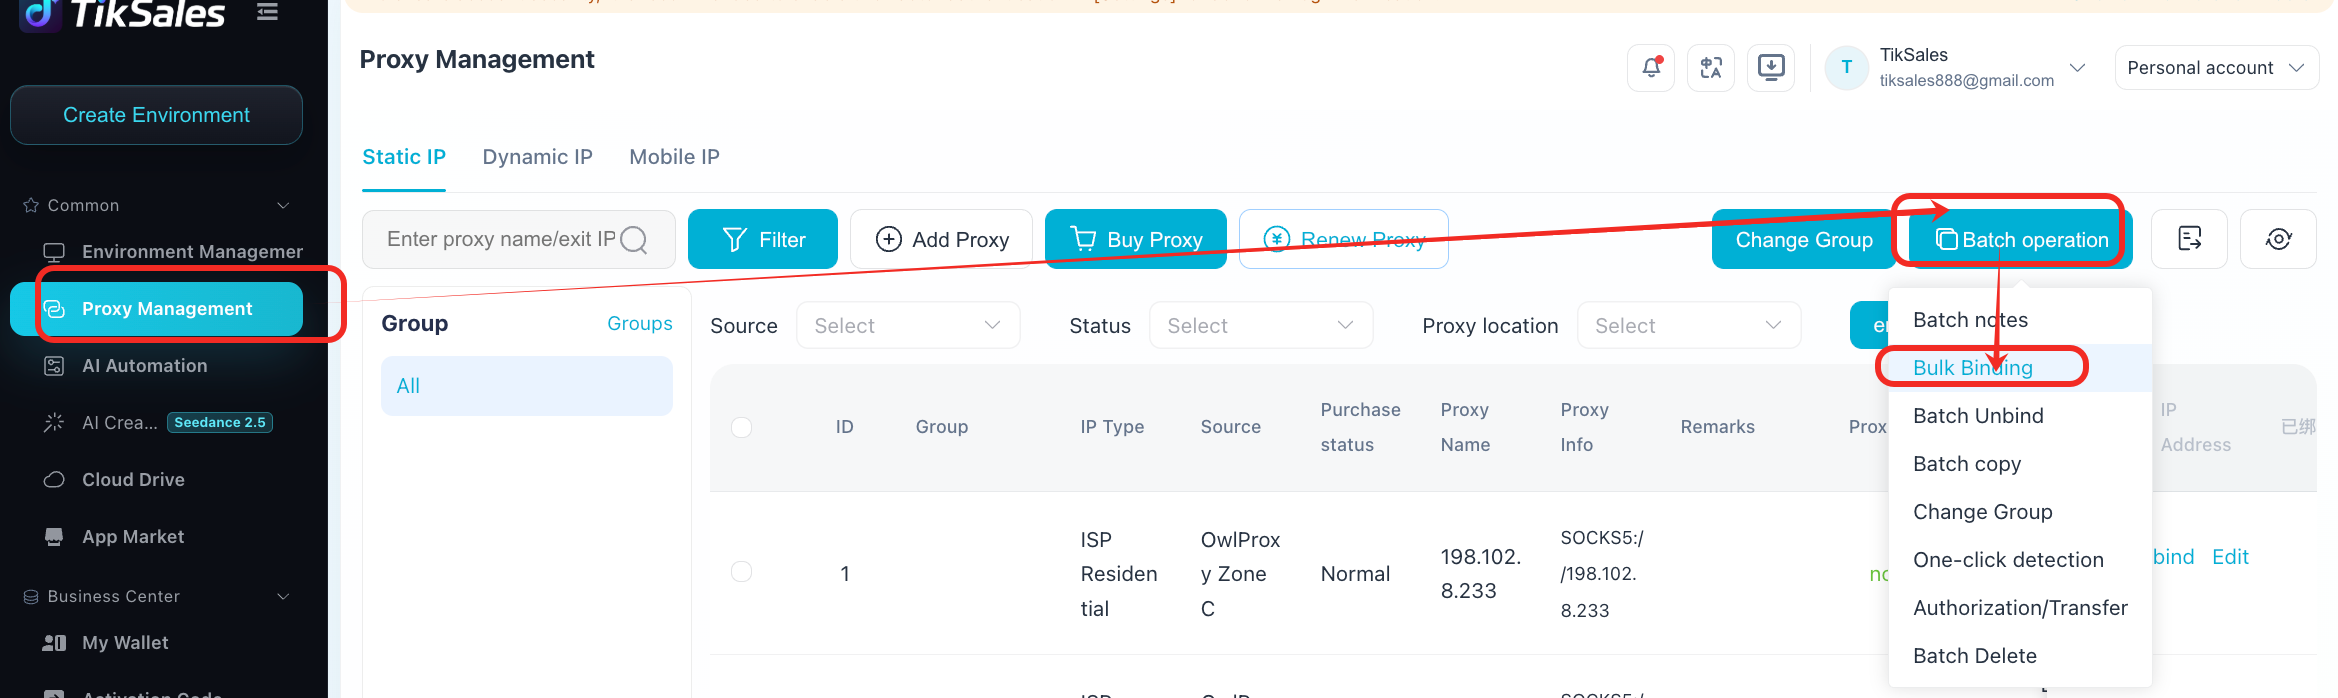
If you need to assign multiple proxies to multiple environments, go to Proxy Management and select Batch Actions → Bulk Binding.
During batch binding, TikSales assigns proxies to environments according to the selection order of the environments and proxies.
If the number of selected environments is greater than the number of selected proxies, the system will cycle through the proxy list in order until all selected environments have been assigned a proxy.
Tips
It is recommended to assign one proxy IP to one environment.This is a best practice for secure account operations and an important measure to reduce account association risks.
Devices support Smart IP. Once a proxy is bound, the device's outbound IP address will automatically be updated based on the bound proxy.
